
The Madaxeman
Madaxeman.com's Home Page
  • Home
  • Latest Posts
  • Links Page
  • Battle Reports
  • ADLG Index
  • ADLG Wiki
  • Malifaux
  • C London Club
  • 15mm Gallery
  • 15mm Suppliers
  • Facebook
  • The Podcast
  • 10mm
  • Consent Preferences
 RSS Feed

Madaxemans 10mm & Real World Photo Gallery

Photos from museums, and from my 10mm wargaming collection

  • Home
  • Login
  • Album list
    • Last uploads
    • Last comments
    • Most viewed
    • Top rated
    • By date
    • My Favorites
  • Search

The 10mm & Real World Museums Photo Directory - helping you choose the best 10mm tanks, or dig out real cammo schemes from tanks and other military vehicles in museums and shows around the world. You can also search the directory by manufacturer, army or keyword

Anyone can rate the photos just by clicking on the stars beneath each photo. Ratings use a scale of 0-5 where 5 = excellent and 0 = terrible.

Most viewed
PICT1791.JPG
DD Sherman171 viewsDD tanks worked by erecting a 'flotation screen' around the tank, which enabled it to float, and had a propeller powered by the tank's engine to drive them in the water.
The DD tanks were one of the many specialised assault vehicles, collectively known as Hobart's Funnies, devised to support the planned invasion of Europe
IMGP5070.JPG
171 views
IMGP5116.JPG
171 views
IMGP5130.JPG
171 views
IMGP5178.JPG
171 views
IMGP5199.JPG
Nashhorn171 views
PICT0262.JPG
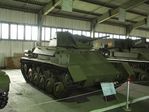
Airborne tankette170 views
M3_Half_Track.JPG
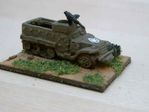
M3 Half Track170 views
atgw_2.JPG
170 views
russian_aa_gun.JPG
170 views
3463 files on 347 page(s) 1 - 219 220 221 222 223 224 225 226 227 228 - 347


Visit Madaxeman on

Youtube Logo
Blogger Logo
Facebook Logo
Podbean Logo
Twitter Logo
Spotify Logo
Pinterest Logo
iTunes Logo
Tune In Logo

Podcasts to download from Madaxeman.com

(Also available on Podbean, iTunes and Spotify)


(These are "affiliate links". If you buy something after clicking on them I get a small kickback from eBay)

Page Loads for the 10mm & Museums Gallery:

About This Site & Privacy Information

Powered by Coppermine Photo Gallery