
The Madaxeman
Madaxeman.com's Home Page
  • Home
  • Latest Posts
  • Links Page
  • Battle Reports
  • ADLG Index
  • ADLG Wiki
  • Malifaux
  • C London Club
  • 15mm Gallery
  • 15mm Suppliers
  • Facebook
  • The Podcast
  • 10mm
  • Consent Preferences
 RSS Feed

Madaxemans 10mm & Real World Photo Gallery

Photos from museums, and from my 10mm wargaming collection

  • Home
  • Login
  • Album list
    • Last uploads
    • Last comments
    • Most viewed
    • Top rated
    • By date
    • My Favorites
  • Search

The 10mm & Real World Museums Photo Directory - helping you choose the best 10mm tanks, or dig out real cammo schemes from tanks and other military vehicles in museums and shows around the world. You can also search the directory by manufacturer, army or keyword

Anyone can rate the photos just by clicking on the stars beneath each photo. Ratings use a scale of 0-5 where 5 = excellent and 0 = terrible.

Most viewed
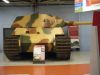
IMGP0578.JPG
King Tiger 210 viewsThe Tiger II combined the thick armor of the Tiger I with the sloped armor used on the Panther medium tank. The tank weighed almost seventy metric tons, was protected by 100 to 180 mm (3.9 to 7.1 in) of armor to the front, and was armed with the long barreled 8.8 cm Kampfwagenkanone 43 L/71 gun.
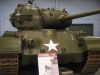
IMGP0581.JPG
M26 Peshing210 viewsThe Pershing was the first operational heavy tank of the US Army; originally designated the T26, the tank ended its service as the M26 Pershing medium tank. Named after General John J. Pershing who led the American Expeditionary Force in Europe in World War I, it was briefly used both in World War II and in the Korean War. Intended as an improvement of the M4 Sherman, the prolonged time of development meant only a small number saw combat in the European theater, most notably the 9th Armored Division's dramatic dash to take the Bridge at Remagen.
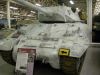
IMGP0586.JPG
M10 Tank Destroyer210 viewsIn its combat debut in Tunisia in 1943 during the North African campaign, the M10 was successful as its M7 3-inch gun could destroy most German tanks then in service. The M10's heavy chassis did not conform to the tank destroyer doctrine of employing very light high-speed vehicles, and starting in mid-1944 it began to be supplemented by the 76mm Gun Motor Carriage M18 "Hellcat". Later in the Battle of Normandy, the M10's gun proved to be ineffective against the frontal armor of the newer German Tiger and Panther tanks unless firing HVAP rounds
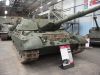
PICT1834.JPG
Leopard 1 C1210 viewsCanada acquired 127 Leopard C1 tanks (equivalent to Leopard 1A3 with laser rangefinder), in 1978–79 for its Land Forces, with 114 being put into service. Starting in 2000, the 114 Leopard C1 tanks in service were upgraded to C2 standard at a cost of CAD $139 million. The turrets of 123 surplus Leopard 1A5 tanks purchased from the German Defence Ministry were fitted into the existing hulls (nine turrets were reserved for spare parts and training), and the German tank hulls sold back to the upgrade contractor
IMGP5011.JPG
210 views
IMGP5013.JPG
OT-64210 views
IMGP5045.JPG
StuG210 views The StuG III was initially designated "StuG" but with the creation of the StuG IV it was re-designated the "StuG III" to distinguish the two. Initially they were intended as a mobile, armored gun platform, providing close fire support to the infantry to destroy bunkers, pillboxes and other entrenched positions. As the war progressed a number of aspects of the StuG series made them a valued supplement to the panzer forces.
IMGP4888.JPG
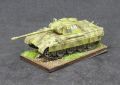
Panther210 viewsCan-do Takara pre-paint
minifigs_25116.JPG
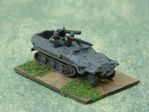
251/16 flame209 views
IMGP1636.JPG
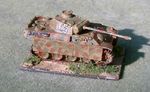
Panther 209 views
3464 files on 347 page(s) 1 - 146 147 148 149 150 151 152 153 154 155 - 347


Visit Madaxeman on

Youtube Logo
Blogger Logo
Facebook Logo
Podbean Logo
Twitter Logo
Spotify Logo
Pinterest Logo
iTunes Logo
Tune In Logo

Podcasts to download from Madaxeman.com

(Also available on Podbean, iTunes and Spotify)


(These are "affiliate links". If you buy something after clicking on them I get a small kickback from eBay)

Page Loads for the 10mm & Museums Gallery:

About This Site & Privacy Information

Powered by Coppermine Photo Gallery